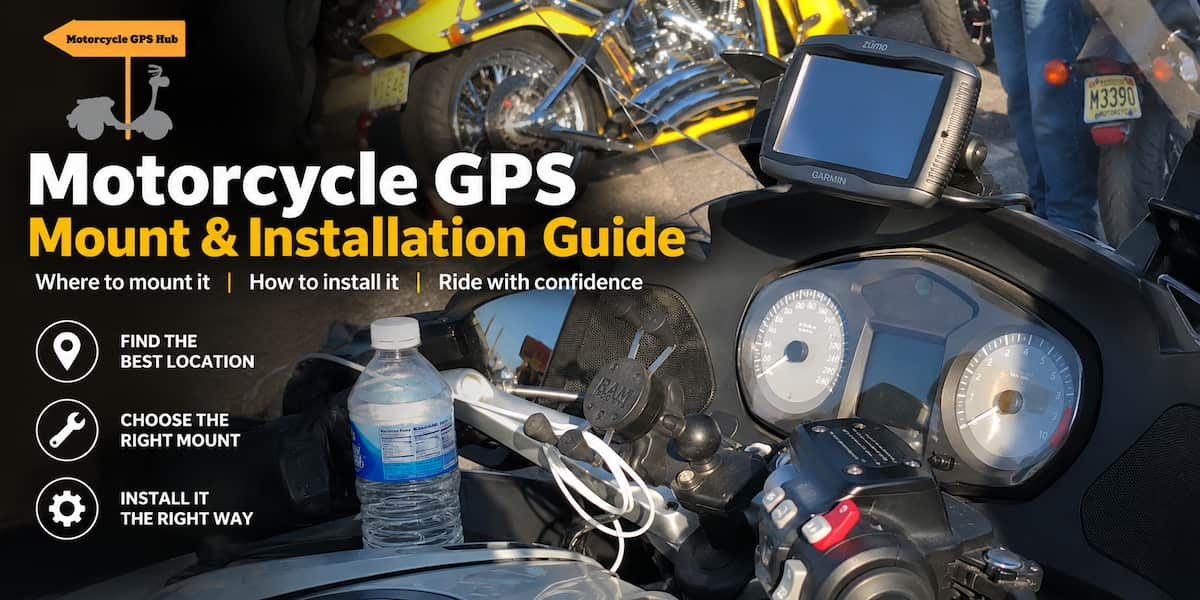
Installing a motorcycle GPS mount is not difficult, but the best time to think about mounting location, positioning, and power is before you start bolting parts to the bike. A little planning gives you a cleaner cockpit layout, a safer viewing angle, and fewer cables catching around the handlebars. This guide covers the most reliable motorcycle GPS mounting locations, how modular RAM ball-and-socket hardware works with the industry-standard AMPS pattern, and the mechanical checks every rider should complete before heading out on the road.
If you are still deciding which navigation unit to buy, start with our guide to choosing a motorcycle GPS. Our recommendations draw on 20 years of experience selling and evaluating GPS devices and mounting equipment, supported by product research and technical analysis.
Quick answer: Most dedicated motorcycle GPS units from Garmin and TomTom attach using a 4-hole AMPS pattern connected to a 1-inch RAM B-size ball system. Exposed tubular bars usually take a U-bolt handlebar base, crowded touring bars fit a brake or clutch reservoir clamp, and sport bikes with clip-ons work best with a fork-stem or mirror-stem base. Always verify full left-to-right steering lock clearance before final tightening, and never apply liquid threadlocker near a plastic GPS cradle.
Motorcycle GPS Mount Summary
Pick the mounting hardware that matches your handlebar layout. Because RAM B-size 1-inch ball components are modular, you can swap the lower base to fit any motorcycle while keeping your existing double-socket arm and 4-hole AMPS GPS cradle plate.
| Mount / Hardware | Best For | Fit |
|---|---|---|
| RAM Handlebar U-Bolt Base (RAM-B-231ZU) | Naked bikes, cruisers, dual-sports, and adventure bikes with exposed bars | 0.5-inch to 1.25-inch round handlebar tubing |
| RAM Fork Stem Base (RAM-B-342U) | Sport bikes and sport-tourers with clip-on handlebars | 12mm to 38mm open, hollow steering stem bore |
| RAM Mirror Stem Base (RAM-B-272U) | Scooters, cruisers, and commuters with threaded handlebar mirrors | 9mm hole under mirror stem or M8 bolt boss |
| RAM Medium Double-Socket Arm (RAM-B-201U) | Connecting any 1-inch motorcycle base ball to a GPS cradle ball | Standard 1-inch B-size ball sockets (3.73-inch overall length) |
| RAM 4-Hole Square AMPS Base (RAM-B-347U) | Bolting directly to the back of Garmin Zumo and TomTom Rider docks | 1.188-inch x 1.813-inch rectangular AMPS hole pattern |
| Garmin Zumo XT3 (6-Inch) | Riders who want a complete weatherproof navigator and powered cradle | Includes RAM handlebar mount and 4-hole AMPS cradle |
Where Should You Mount a Motorcycle GPS?
There is no single mounting location that works best on every motorcycle. Your primary goal is placing the screen where you can read turn directions with a brief glance without blocking the speedometer, warning lights, ignition switch, or your view of the road ahead. Because handlebar geometry, windscreens, and tank shapes vary widely across cruisers, adventure bikes, tourers, and sport bikes, choosing the right base is the foundation of a solid setup.
The five most common motorcycle GPS mounting locations are:
- Exposed handlebar: Uses a U-bolt or pinch clamp around open round tubing.
- Brake or clutch reservoir clamp: Uses longer replacement bolts on the master cylinder bracket when bar space is full.
- Fork stem (steering stem): Uses an expansion plug inside the hollow center bore of the upper triple clamp.
- Mirror stem or mirror thread: Uses an angled tab with a 9mm hole under the mirror base or threads into an open mirror boss.
- Navigation bar or accessory crossbar: Uses an upper bar above the instrument cluster, common on adventure and rally motorcycles.
| Mounting Base Type | Best Motorcycle Fit | Key Requirement or Limitation |
|---|---|---|
| Handlebar U-Bolt Base | Naked bikes, cruisers, dual-sports, and standards with exposed round bars | Requires about 1 inch of open bar space and matching tubing diameter |
| Brake / Clutch Clamp Base | Touring bikes (such as Honda Goldwing) and motorcycles with cast or crowded handlebars | Requires compatible master cylinder bolt spacing and thread pitch |
| Fork Stem Base | Sport bikes and sport-tourers with clip-on handlebars | Requires an open, hollow center steering stem bore |
| Mirror Stem Base (9mm Hole) | Scooters, cruisers, and commuters with handlebar-mounted threaded mirrors | Will not fit fairing-mounted sport bike mirrors or oversize mirror posts |
Understanding RAM Mounts and the AMPS Hole Pattern
Most dedicated motorcycle GPS devices sold over the past decade include mounting hardware made by RAM Mounts in Seattle, Washington. RAM systems rely on an elastomeric rubber ball-and-socket architecture that isolates the electronics from high-frequency engine buzz while letting you pivot the screen in almost any direction. A complete modular RAM installation consists of three mechanical parts: a motorcycle base, a double-socket connecting arm, and a device adapter plate bolted to the back of the GPS cradle.
The 4-Hole AMPS Mounting Pattern Explained
Garmin Zumo cradles and most TomTom Rider docks attach to their mounting ball using the industry-standard AMPS hole pattern. A standard 4-hole rectangular AMPS pattern measures 1.188 inches by 1.813 inches (30.17 mm by 46.05 mm) center-to-center. Some compact adapters use a 2-hole diamond plate that catches two diagonal corners at 1.912 inches, though the 4-hole plate distributes the weight of a 6-inch navigator much more evenly.
Because most motorcycle GPS mounts use RAM’s B-size 1-inch rubber ball, the components are largely interchangeable. If the handlebar U-bolt that came in your GPS box does not fit your motorcycle, you do not need to replace the entire cradle or arm. You only need to swap the lower base for a fork-stem, mirror, or clutch clamp base that terminates in a 1-inch ball.
Important: Never put Loctite or liquid threadlocker on the machine screws that attach an AMPS plate to a plastic GPS cradle. Anaerobic threadlocker chemicals attack polycarbonate and ABS plastics, causing stress fractures that can make the cradle bosses crack under road vibration. Use the included stainless machine screws, flat washers, and nylon-insert locknuts dry.
1. Handlebar Motorcycle GPS Mount
A handlebar mount remains the most versatile way to install a motorcycle GPS on bikes with exposed tubular handlebars. Pairing a handlebar base with a double-socket arm lets you angle the GPS inward toward the center of the bike, raise it above the bar clamp, or tilt it downward to reduce overhead sun glare.
Before ordering or bolting on a handlebar base, measure the outside diameter of the exact section of bar where the clamp will sit. Many modern adventure and naked motorcycles use tapered fatbars that measure 1-1/8 inches (28.6 mm) at the center riser before tapering down to 7/8 inch (22.2 mm) near the grips, while many American cruisers use 1-inch or 1-1/4-inch tubing. Also inspect how much unobstructed clamping width you have once heated-grip controllers, ABS wiring looms, switchgear housings, and hydraulic reservoirs are accounted for.
Choosing Your Handlebar Hardware and Modular Links
If you are outfitting a second motorcycle or replacing a lost base, the RAM-B-231ZU handlebar U-bolt base is the standard marine-grade aluminum foundation included with dedicated motorcycle GPS kits. It ships with two zinc-coated U-bolts and a composite reducer shim to fit round tubing from 0.5 inch up to 1.25 inches in diameter.
To connect your handlebar ball base to the GPS cradle ball, the RAM-B-201U medium double-socket arm is the standard 3.73-inch connecting link (with a 3-inch socket-to-socket span) used across most motorcycle cockpits.
Finally, if you need a second 4-hole adapter plate to leave bolted to a spare powered dock, the RAM-B-347U square AMPS ball base matches the exact 1.188-inch by 1.813-inch rectangular hole pattern on the back of Garmin Zumo and TomTom Rider cradles.
Step-by-Step Handlebar U-Bolt Installation
Installing a RAM U-bolt base takes only a few minutes, but doing it evenly keeps the clamp from twisting under the weight of the GPS:
- Select the bar location: Pick a spot on the left or center section of the handlebar that keeps the GPS clear of the throttle hand and front brake reservoir.
- Fit the composite shim if needed: If you are mounting onto standard 7/8-inch handlebars, nest the black composite reducer bushing inside the curve of the U-bolt so the metal rod sits snugly against the smaller tube.
- Position the base and nuts: Slip the U-bolt under the handlebar, guide both threaded legs up through the holes in the ball base, and thread the two nylon-insert locknuts onto the ends by hand.
- Tighten evenly with a wrench: Use a socket or box-end wrench to tighten the two locknuts alternately by a few turns on each side. Keep the exposed thread length equal on both sides so the clamp seats squarely without pinching.
- Cap the threads: Press the included rubber acorn caps over the exposed tips of the U-bolt threads to prevent snagged gloves or wiring.
2. Brake or Clutch Clamp Mount
Some motorcycles either have no exposed tubular handlebar at all or have bars that are completely covered by plastic cladding and switchgear. A classic example is the Honda Goldwing, which uses sculpted cast handlebar halves rather than round tubing. In those cases, a brake or clutch reservoir clamp mount solves the problem cleanly.
This mounting style sits directly over the two-bolt half-clamp that secures your clutch perch or front brake master cylinder to the bar, or replaces an M8 handlebar riser pinch bolt using a base like the RAM-B-367U. For a two-bolt reservoir bracket, you remove the two factory pinch bolts, place cylindrical aluminum spacers into the recessed holes of the RAM bracket, and thread longer stainless steel bolts through the bracket and clamp into the master cylinder housing. Because you are loosening a primary control perch, support the clutch or brake assembly with one hand while swapping the bolts so it does not slip out of alignment. Check your bike’s bolt center spacing (commonly 32 mm to 38 mm) and thread type (metric M6 versus SAE 1/4-20 on many Harley-Davidson models) before starting, and tighten the replacement bolts to your service manual’s torque spec.
3. Fork Stem GPS Mount
Sport bikes and supersport machines equipped with clip-on handlebars rarely have room for a U-bolt clamp, and their steeply angled master cylinders leave little clearance inside the upper fairing. When your triple tree has an open, hollow center steering stem nut, a fork-stem base is usually the cleanest mounting solution on the bike.
The RAM-B-342U motorcycle fork-stem base is designed for steering stem bores from 12 mm to 38 mm (0.5 inch to 1.49 inches) in internal diameter. As you tighten the top machine screw, a tapered metal cone pulls upward inside a split rubber expansion plug, wedging the plug against the inner wall of the steering tube. That leaves a low-profile 1-inch ball centered on the motorcycle’s steering axis, where a short or medium arm can hold your GPS directly below the tach without interfering with the clip-ons.
4. Mirror Stem GPS Mount
If your handlebars are full and your steering stem is capped or solid, the mirror mount boss provides another sturdy attachment point. This works well on scooters, dual-sports, and upright standards where the mirrors thread directly into the handlebar perches rather than the front fairing.
The RAM-B-272U angled base with a 9mm hole slips under your mirror stem or accepts an M8 bolt into an unused mirror thread boss. Its offset 1-inch ball sits clear of the mirror locknut, letting you attach a RAM arm and GPS cradle or pair it with a phone holder on the opposite side of the cockpit.
How High Should a Motorcycle GPS Be Mounted?
Higher is not always better when positioning a screen in the cockpit. While adventure riders who stand on the footpegs often mount their navigator on an upper windscreen crossbar to keep it near eye level, mounting a unit too high on a street bike can block your view of pavement hazards or catch turbulent wind buffeting around the top of the screen.
Before locking down your mounting hardware, sit on the motorcycle in your normal riding posture wearing your helmet and jacket:
- Check instrument visibility: Confirm that the GPS housing and cradle do not cover your speedometer, turn-signal indicators, neutral light, or oil-pressure warning lamp.
- Check key and switch access: Make sure you can still reach the ignition key, hazard button, and fork lock with a gloved hand when the GPS is snapped into its dock.
- Set the screen tilt angle: Angle the display slightly toward your eyes so it does not reflect the bright sky directly into your visor at midday, or see our guide to eliminating motorcycle GPS sun glare if reflections persist.
Check the Mount at Full Steering Lock
Verifying clearance from full left lock to full right lock is the single most important safety check in any motorcycle GPS installation. A mount that looks well centered while the front wheel points straight ahead in the garage can strike the fuel tank, dent a fairing panel, or crush the windscreen when you turn the handlebars all the way to the stops during a slow U-turn.
With the GPS snapped into its cradle and the arm knob snugged down, swing the handlebars all the way to the left stop and then all the way to the right stop. Watch every part of the assembly closely:
- The GPS chassis and sun visor: Ensure at least half an inch of clearance from the inside of the windscreen and upper fairing stays.
- The RAM wingnut and arm: Confirm that the tightening knob does not hit the top of the fuel tank or tank bag at full lock.
- Throttle and clutch cables: Verify that the mount does not trap or bend the throttle housings, making sure the throttle snaps shut freely in both directions.
- Hydraulic brake and clutch hoses: Check that flexible lines move without rubbing against the edges of the AMPS plate or U-bolt.
- The GPS power harness: Leave a smooth service loop so the power wire never pulls taut as the fork rotates.
Short RAM Arm or Medium RAM Arm?
RAM B-size double-socket arms are commonly sold in two lengths for motorcycle cockpit use: the short arm (RAM-B-201U-A, about 2.42 inches overall) and the medium arm (RAM-B-201U, about 3.73 inches overall). Choosing between them comes down to leverage versus reach.
A shorter arm holds the mass of the GPS closer to the mounting ball, which cuts down on lever-arm bounce over rough pavement and keeps the screen tucked tightly against the bars. However, a short arm has a smaller swing radius. If your mounting ball sits right next to a tall brake fluid reservoir or you need to reach up and around a handlebar clamp, the medium arm gives you two full articulation points with enough clearance to position the screen where you want it. As a rule of thumb, use the shortest arm that achieves a clear line of sight without contacting adjacent controls. Once your position is finalized, consider replacing the standard hand-turn wing nut with a locking knob as detailed in our motorcycle GPS anti-theft guide.
Installing a Garmin Zumo XT3
Garmin’s latest dedicated motorcycle navigator is the Zumo XT3, built in both a compact 4.7-inch version (roughly 7 ounces) and a larger 6-inch version (roughly 12 ounces). Both models carry IPX7 water and IP6X dust ratings and lock into a motorcycle-specific powered cradle that bolts directly to a 4-hole AMPS ball plate.
Because the 6-inch Zumo XT3 has a wider footprint and more weight than smaller units, take extra care to tighten your U-bolt or clutch clamp base properly and position the arm so the heavier housing sits roughly over the support ball rather than hanging straight out horizontally. You can read our full Garmin Zumo XT3 review for complete details on its display sizes, mounting hardware, and companion app features.
How to Power a Motorcycle GPS and Route the Wiring
Once your mechanical mount is in place, you need to connect the power harness safely. Dedicated motorcycle GPS units like the Garmin Zumo use a hardwired two-wire harness integrated into the weatherproof cradle, whereas riders using a smartphone as a motorcycle GPS typically rely on a handlebar USB-C port or an SAE-to-USB adapter plugged into a battery tender lead.
Your main electrical choice is whether to wire the cradle directly to the battery terminals (which keeps the GPS powered during brief fuel stops) or tap into a 12V switched accessory circuit that shuts off automatically with the ignition key so the cradle cannot drain your battery in storage. We walk through both wiring methods step by step in our motorcycle USB charger and GPS power guide. Whichever method you prefer, route the cable along the motorcycle’s factory main wiring loom before zip-tying anything down. Keep the wire clear of exhaust headers, radiator fans, and suspension pinch points, and verify that the cable has enough slack around the steering head to move freely from lock to lock.
Using a Car GPS on a Motorcycle
Some riders adapt an automotive navigator such as a Garmin Drive or older Nuvi for fair-weather touring, but mounting a car unit on a bike requires extra planning. Automotive windshield suction cups will not hold reliably on a motorcycle windscreen or fuel tank, and car cradles are not designed to retain the device over sharp potholes.
To mount a car GPS on handlebars, you need a model-specific RAM form-fitting cradle or a weather-resistant enclosure that converts the device to a 1-inch ball interface. You also have to account for rain protection and glove operation, which we cover step by step in our guide to using a Garmin Drive or Nuvi car GPS on a motorcycle as well as our walkthrough on keeping a motorcycle GPS dry in the rain.
Motorcycle GPS Installation Hardware Summary
You will not need every component listed below. Most dedicated motorcycle navigators include a handlebar U-bolt, a short or medium arm, and an AMPS plate in the box, so you only need an alternate base if your bars require a fork-stem or mirror mount, or if you are outfitting a second motorcycle.
| Hardware Component | Part / Model | Primary Role in Setup |
|---|---|---|
| Handlebar U-Bolt Ball Base | RAM-B-231ZU | 1-inch B-size ball base with zinc-coated U-bolts for 0.5″ to 1.25″ handlebars |
| Double-Socket Connecting Arm | RAM-B-201U Medium Arm | 3.73-inch B-size arm linking the base ball to the cradle ball |
| 4-Hole AMPS Cradle Adapter | RAM-B-347U Square Base | 1.188″ x 1.813″ plate that bolts to the back of Garmin Zumo and TomTom docks |
| Hollow Steering Stem Base | RAM-B-342U Fork Stem Base | Expansion-plug 1-inch ball base for sport bikes with clip-on handlebars |
| Mirror Post Base | RAM-B-272U 9mm Hole Base | Angled 1-inch ball plate that mounts beneath a handlebar mirror stem |
Pre-Ride Motorcycle GPS Installation Checklist
Before taking your motorcycle out on a highway trip, run through this final inspection in the driveway:
- The AMPS adapter screws are snugged with dry nylock nuts (zero liquid threadlocker on plastic cradle parts).
- The U-bolt locknuts, clutch clamp bolts, or fork-stem expansion plug are tightened securely with hand tools.
- The GPS clicks firmly into its cradle latch and does not rattle when tugged by hand.
- The screen does not block the speedometer, tachometer, or dashboard warning lights from your seated riding posture.
- The handlebars turn smoothly from full left lock to full right lock without the GPS or arm touching the fuel tank or windscreen.
- The throttle twists freely and snaps closed at both steering stops.
- Hydraulic brake lines, clutch cables, and wiring looms move without rubbing or binding against the mount.
- The power harness is zip-tied away from hot engine components and begins charging the GPS as expected.
Frequently Asked Questions
Do all Garmin Zumo and TomTom Rider cradles use the same mounting pattern?
Dedicated Garmin Zumo and TomTom Rider motorcycle docks generally use the standard 4-hole rectangular AMPS pattern measuring 1.188 inches by 1.813 inches center-to-center. While the electrical pins and plastic cradle shapes are unique to each GPS generation, the four mechanical mounting holes on the back plate are consistent, so you can usually bolt a new cradle onto your existing RAM B-size AMPS ball adapter.
Why should you keep Loctite away from a motorcycle GPS cradle?
Standard anaerobic threadlockers (such as blue or red Loctite) chemically attack thermoplastic materials like polycarbonate and ABS, which are used to mold GPS cradles. Even small amounts of liquid runoff or vapor can craze and embrittle the plastic around the bolt holes, causing the cradle to crack under normal motorcycle vibration. Use the supplied nylon-insert locknuts dry instead.
What size RAM ball do motorcycle GPS mounts use?
Most motorcycle GPS and smartphone mounts use RAM’s B-size 1-inch diameter elastomeric rubber ball. Larger C-size (1.5-inch) balls are typically reserved for heavy marine fishfinders or full-size rugged tablets and are larger than necessary for a 4.7-inch or 6-inch motorcycle navigator.
Final Thoughts on Mounting Your Motorcycle GPS
A dependable motorcycle GPS installation comes down to matching the base to your bike’s cockpit, tightening the mechanical fasteners properly, and checking full lock-to-lock clearance before tightening the final cable ties. Handlebar U-bolts remain the simplest route for exposed round bars, brake or clutch reservoir brackets clean up crowded touring handlebars, and fork-stem bases give sport bike riders a centered view between the clip-ons. Once your mount is bolted down and your power wire is routed safely away from moving parts, take a short test ride on familiar local roads so you can fine-tune the screen tilt angle before your next long tour.