
Building a dependable SiriusXM motorcycle setup is easier than it first appears once you match the receiver, power supply, antenna placement, and audio output to your cockpit. You need a satellite radio or motorcycle kit, a secure handlebar or fairing mount, regulated power from the bike, an antenna with an unobstructed view of the sky, and a clean path to send audio into your Bluetooth helmet headset or touring stereo.
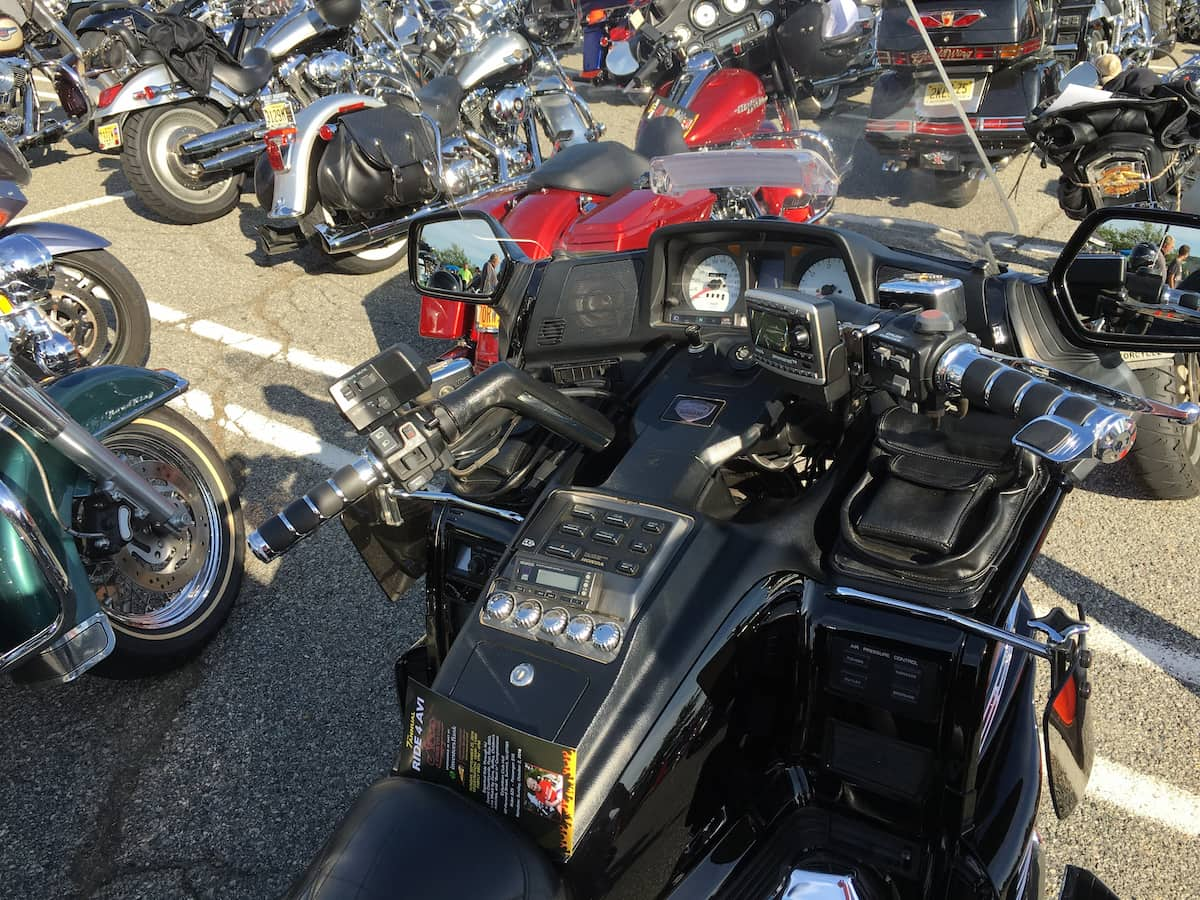
There are three primary ways to put together an XM radio for motorcycle touring, ranging from an inexpensive dock-and-play Onyx EZR to a Bluetooth-equipped Roady BT or a permanently wired Commander Touch system. Our recommendations draw on 20 years of experience selling and evaluating GPS devices and mounting equipment, supported by product research and technical analysis. Below, we compare the best receivers, explain critical 5V versus 12V wiring rules, and show how satellite radio pairs with modern Garmin Zumo and motorcycle CarPlay cockpits.
Quick answer: For most riders building a new satellite radio setup, the SiriusXM Roady BT is the best overall choice because it integrates Bluetooth audio output alongside 3.5mm AUX and wired FM options. If you want the lowest hardware cost or a traditional dock-and-play receiver that unclips in seconds and moves between a car dock and a RAM motorcycle mount, choose the SiriusXM Onyx EZR. For full-dress touring bikes with an existing fairing stereo and AUX input, the SiriusXM Commander Touch provides the cleanest permanent dash installation.
Can You Use SiriusXM on a Motorcycle?
Yes, you can run SiriusXM on any motorcycle without needing a special satellite network or a motorcycle-only subscription plan. The satellites broadcasting music, talk, weather, and live sports to cars and trucks are the exact same satellites your motorcycle antenna tracks on the open highway. The real engineering challenge is adapting automotive radio hardware, power adapters, magnetic antennas, and audio cables to survive wind, vibration, and rain on two wheels.
In practice, riders use one of three hardware paths to get satellite radio on the bars:
- Bluetooth satellite radio: The SiriusXM Roady BT uses a compact color display controller and transmits audio over built-in Bluetooth, a 3.5mm AUX cable, or a wired FM relay.
- Portable dock-and-play radio: The SiriusXM Onyx EZR snaps into a powered cradle with a four-hole AMPS mounting pattern on the back, letting you pop the receiver out of its dock whenever you park.
- Permanent hideaway installation: The SiriusXM Commander Touch places a small touchscreen controller on the dash while hiding the metal tuner module and 12V wiring harness inside the fairing.
Which path makes the most sense depends on whether you ride a naked or adventure bike that relies on a Bluetooth helmet communicator, or a full-fairing touring motorcycle with a built-in amplifier and speaker system.
Best SiriusXM Motorcycle Options Compared
Compare the core hardware specifications, audio outputs, and power architectures of the three main SiriusXM receivers used on motorcycles below.
| Radio Model | Best For | Display Type | Audio Outputs | Power & Mounting Architecture |
|---|---|---|---|---|
| SiriusXM Roady BT | Best overall for most riders | 3.2-inch full-color display | Bluetooth, 3.5mm AUX, wired FM out | 12V Intelligent Power Adapter houses tuner; magnetic display mount |
| SiriusXM Onyx EZR | Best value & multi-vehicle dock swaps | 3.2-inch high-contrast monochrome | 3.5mm AUX, FM out (or optional BT dock) | 5V DC PowerConnect dock with standard 4-hole AMPS rear pattern |
| SiriusXM Commander Touch | Cleanest permanent touring install | 2.8-inch color capacitive touchscreen | 3.5mm AUX & RCA stereo line-out | 12V DC 3-wire hideaway tuner module with compact dash display |
1. Best Overall: SiriusXM Roady BT (SXVRBT1)
For a new SiriusXM motorcycle installation, the SiriusXM Roady BT (model SXVRBT1) is the most versatile receiver on the market. Its primary advantage is built-in Bluetooth audio transmission alongside a 3.5mm AUX port and a 2.5mm FM output. On a motorcycle without a fairing stereo, Bluetooth output lets the receiver transmit satellite radio wirelessly to compatible Bluetooth audio equipment or a stereo receiver without routing an exposed 3.5mm audio cord from the handlebars into your jacket.
The Roady BT features a 3.2-inch full-color screen with adjustable daytime and nighttime backlighting, physical pushbuttons around the bezel that are easy to press with riding gloves, and storage for up to 20 favorite channel presets. It also includes premium tuner capabilities that budget receivers skip, including TuneStart (which automatically starts songs from the beginning when you tune to a preset channel), song and sports game alerts, and up to 60 minutes of live pause, rewind, and replay buffer.
Before installing the Roady BT on a motorcycle, you need to understand its unique two-piece hardware layout. Unlike traditional dock-and-play radios, the satellite tuner, Radio ID chip, Bluetooth module, antenna jack, and AUX port are all built inside the oversized 12V cigarette-lighter plug (which SiriusXM calls the Intelligent Power Adapter, measuring 3.7 by 2.1 by 1.2 inches). Only a single 6-foot Micro-B USB cable runs from that power plug up to the handlebar display head. Out of the box, the display attaches via a magnetic clip rather than a 4-hole AMPS cradle, so motorcycle riders should either place the display inside a zippered weatherproof RAM enclosure or use an aftermarket powersports mount kit while tucking the 12V Intelligent Power Adapter inside a dry fairing pocket or tank bag.
Best for: Riders who want built-in Bluetooth audio output, live pause and rewind features, a color display, and a single thin display cable running up to the handlebars.
Skip it if: You want a traditional 4-hole AMPS cradle that swaps between old PowerConnect car docks, or you do not have space under your fairing or tank bag to house the 12V Intelligent Power Adapter plug.
2. Best Value and Portability: SiriusXM Onyx EZR (SXEZR1V1)
The SiriusXM Onyx EZR (model SXEZR1V1) remains the most practical budget way to add satellite radio to a motorcycle. It uses SiriusXM’s classic dock-and-play architecture: the radio receiver slides into a powered vehicle cradle (the XDPIV2 PowerConnect dock) and releases with a single top latch when you park. That modularity offers two major benefits for riders. First, you never have to leave the receiver exposed to weather or theft at a restaurant stop. Second, you can move the exact same Onyx EZR head unit between your motorcycle, your car, and a home speaker dock under a single satellite subscription.
Instead of a color LCD that can wash out under overhead sun, the Onyx EZR uses a 3.2-inch high-contrast white-on-black monochrome screen paired with large tactile buttons. It stores up to 10 channel presets, supports One-Touch Jump to traffic and weather or your previous channel, and includes TuneMix, which builds a custom blend of songs from your saved music channels. Another mechanical advantage is on the back of the included PowerConnect vehicle dock: it uses the industry-standard 4-hole AMPS hole pattern, meaning it bolts directly onto a RAM B-size AMPS ball adapter plate without custom fabrication.
The primary limitation compared with the Roady BT is audio connectivity. The standard Onyx EZR kit does not have built-in Bluetooth, so motorcycle setups must either connect a 3.5mm AUX cable from the dock’s green audio jack into a motorcycle sound system, plug a compact battery-powered Bluetooth 5.0 transmitter into the 3.5mm jack, or upgrade to SiriusXM’s specialty Bluetooth Vehicle Dock (SXBTD1V1). If you already own an Onyx EZR or Onyx Plus in a car, there is no reason to buy a new receiver for your bike; simply bolt its AMPS cradle to a RAM handlebar mount and add a weather cover.
Best for: Value-minded riders, owners who want to swap one radio between their car and motorcycle on a single subscription, and anyone building a modular 4-hole AMPS RAM mount setup.
Skip it if: You want native Bluetooth output right out of the box or live pause/rewind functionality.
3. Best Permanent Touring Installation: SiriusXM Commander Touch (SXVCT1)
The SiriusXM Commander Touch (model SXVCT1) takes a completely different mechanical approach designed for permanent dash integration. Instead of mounting a full radio housing and bulky multi-cable dock on your handlebars, the Commander Touch separates the system into two pieces: a slim, water-resistant 2.8-inch color capacitive touchscreen controller (measuring just 4.1 by 1.7 by 0.5 inches) and a separate metal hideaway tuner module that mounts out of sight inside your fairing or saddlebag.
Because the power harness, satellite antenna lead, and stereo audio cables all plug into the hidden tuner box behind the dash, only a single thin display cable runs out to the touchscreen controller. The hideaway tuner wires directly into your motorcycle’s 12V electrical system using a dedicated 3-wire automotive harness (constant 12V battery power for preset memory, switched 12V ignition accessory power, and chassis ground) and feeds crystal-clear audio into your motorcycle stereo via a 3.5mm AUX cable, stereo RCA jacks, or an inline FM Direct Adapter.
That clean footprint makes the Commander Touch a favorite among Harley-Davidson Electra Glide, Street Glide, Road Glide, Indian Chieftain, and Honda Gold Wing owners who want satellite radio to look like a factory-installed gauge while keeping the pause, rewind, TuneStart, and album-art features of a modern receiver. The tradeoff is zero portability: because the tuner is hardwired behind the bodywork and lacks Bluetooth output, it is meant to stay permanently with the motorcycle and feed an existing wired audio system.
Best for: Full-dress touring motorcycles and baggers equipped with a fairing stereo and 3.5mm AUX or RCA audio inputs where a factory-clean cockpit is the priority.
Skip it if: You ride a motorcycle without an onboard stereo system, rely exclusively on a wireless Bluetooth helmet headset, or want to move the radio to another vehicle.
SiriusXM Hardware vs. Garmin Zumo GPS and Motorcycle CarPlay Streaming
Many long-distance riders arrive at this topic because they used to run satellite radio through an older Garmin navigator, such as the legacy Garmin Zumo 550 (paired with the Garmin GXM 30 smart antenna) or the Garmin Zumo 665LM (paired with the GXM 40 antenna). When upgrading to a modern navigator, riders are often surprised to discover that current Garmin Zumo XT, Zumo XT2, and Zumo XT3 models do not support Garmin GXM USB satellite radio antennas. Garmin removed native satellite-antenna control from the Zumo lineup once smartphone app streaming became widespread.
Today, touring riders running a modern Garmin Zumo XT3 or a wireless motorcycle CarPlay and Android Auto display have two ways to listen to SiriusXM on the road:
- Option 1: Stream the SiriusXM Smartphone App via CarPlay or Bluetooth (Best Inside Cellular Coverage). Every standard SiriusXM vehicle subscription includes streaming access on the SiriusXM mobile app. If your bike has a weatherproof wireless CarPlay or Android Auto screen (such as a CHIGEE AIO-6 Max or Carpuride W502 Pro), the SiriusXM app projects directly onto your handlebar screen with glove-friendly channel icons and streams audio to your helmet without buying a second piece of radio hardware. Similarly, if you ride with a Garmin Zumo XT3, you can launch the SiriusXM app on your phone and skip tracks using the Zumo’s on-screen Bluetooth media player.
- Option 2: Mount a Dedicated Satellite Receiver (Best for Remote Cross-Country and Dead-Zone Touring). App streaming stops working the moment you ride out of 4G/5G cellular coverage in mountain passes, desert basins, or rural backcountry corridors. A standalone satellite receiver like the Roady BT or Onyx EZR pulls its signal directly from orbital satellites, keeping your channels playing across the most remote stretches of North America where cell towers do not exist.
Should You Buy a Complete SiriusXM Motorcycle Kit or Build with RAM Mounts?
If you are starting from zero, specialty aftermarket retailers package complete SiriusXM motorcycle bundles that combine a receiver with powersports mounting hardware. A comprehensive motorcycle kit typically includes:
- A SiriusXM receiver and vehicle dock or display cradle
- A handlebar clamp or brake/clutch reservoir perch mount
- A protective weather-resistant case or clear vinyl rain cover
- A compact short-cable motorcycle satellite antenna and metal L-bracket
- A hardwire power converter or 12V socket harness
- A 3.5mm male-to-male stereo AUX audio cable
Buying a pre-packaged bundle saves time if you want every bracket, rain pouch, and power lead in a single shipment. However, if you already own a SiriusXM dock-and-play receiver or already have RAM B-size 1-inch ball hardware on your handlebars for a GPS, building your own mount setup is simple and often gives you much better positioning flexibility.
Mounting a SiriusXM Radio on Your Handlebars (RAM and AMPS Rules)
The handlebar or clutch/brake master cylinder perch is the most accessible mounting point on most motorcycles. The same mechanical rules that govern a safe GPS installation apply to a satellite radio: the screen must be positioned where you can read channel names with a brief downward glance, and the housing must never touch the fuel tank, windscreen, switchgear, or hydraulic lines when the bars turn from full left lock to full right lock.
If this is your first time bolting electronics to your cockpit, read our motorcycle GPS mount and installation guide for a complete walkthrough of U-bolt handlebar bases, master-cylinder reservoir clamps, fork-stem expansion plugs, and lock-to-lock safety checks.
Using the 4-Hole AMPS Mounting Pattern
Standard SiriusXM dock-and-play cradles (including the PowerConnect XDPIV2 dock supplied with the Onyx EZR and Onyx Plus) feature the industry-standard 4-hole rectangular AMPS hole pattern molded into the back of the plastic dock, spaced 1.188 inches by 1.813 inches (30.17 mm by 46.05 mm). Because Garmin Zumo cradles and RAM mounts use the exact same 4-hole AMPS layout, you can bolt a RAM-B-347U 4-hole square AMPS ball base directly to the back of your SiriusXM dock or weatherproof enclosure, link it to a RAM-B-201U medium double-socket arm, and clamp it to 0.5-inch to 1.25-inch handlebars using a RAM-B-231ZU U-bolt base.
When fastening a metal RAM AMPS plate to the back of a plastic SiriusXM dock, use short machine screws with dry nylon-insert locknuts and never apply liquid threadlocker (such as blue or red Loctite), which chemically attacks ABS and polycarbonate dock plastics and causes the mounting bosses to crack under vibration.
How to Power SiriusXM on a Motorcycle: 5V DC vs. 12V DC Wiring
Important: Never cut the cigarette-lighter plug off a SiriusXM power cord to wire the bare leads directly to a 12V motorcycle battery. First, PowerConnect docks (like the Onyx EZR) run on regulated 5V DC; feeding 12V directly into the dock’s barrel jack will instantly burn out the cradle. Second, on the Roady BT, the entire satellite radio tuner and Bluetooth module live inside the 12V lighter plug housing, so cutting that plug off destroys the radio.
Electrical power is where many DIY motorcycle satellite radio installs go wrong. Different SiriusXM models use completely different voltage and adapter designs, so you must match your wiring method to your exact receiver:
- Powering an Onyx EZR (5V DC Dock Input): The Onyx EZR’s PowerConnect dock requires a stepped-down 5-volt DC input. The cigarette-lighter adapter included in the box steps your vehicle’s 12V power down to 5V inside the plug. To power an Onyx EZR on a motorcycle, either plug its original lighter adapter into a weatherproof 12V female accessory socket wired under your seat or fairing, or purchase a dedicated 12V-to-5V hardwire step-down power converter designed specifically for SiriusXM 5V PowerConnect docks.
- Powering a Roady BT (12V Intelligent Power Adapter): Because the Roady BT’s satellite tuner, antenna jack, and AUX output are housed inside its 12V cigarette-lighter plug, you must keep that plug intact. The cleanest motorcycle solution is wiring a fused, ignition-switched 12V female cigarette socket inside your fairing, tank bag, or under-seat tray, plugging the Roady BT’s Intelligent Power Adapter into that socket, and securing the connection with electrical tape or a heat-shrink sleeve so road vibration cannot wiggle it loose.
- Powering a Commander Touch (12V 3-Wire Harness): The Commander Touch is built for direct hardwiring. Its hideaway tuner module includes a fused 12V wiring harness with three leads: a yellow wire for constant 12V battery power (which retains preset memory), a red wire for switched 12V ignition accessory power (so the unit turns on and off with your key), and a black ground wire.
Whichever receiver you choose, always wire your power socket or converter to an ignition-switched 12V circuit rather than an always-hot battery lead so the satellite tuner cannot drain your motorcycle battery when parked in the garage. For step-by-step guidance on tapping switched circuits, SAE leads, and fuse blocks, read our motorcycle USB charger and GPS power guide.
Where to Mount the SiriusXM Satellite Antenna on a Motorcycle
A SiriusXM antenna needs a clear, upward view of the sky to receive signals from orbital satellites and ground repeaters. While car owners simply slap the magnetic puck antenna onto a steel roof, motorcycles require a more deliberate mounting spot.
The cleanest and most reliable solution is bolting a small flat metal L-bracket (often sold as a SiriusXM perch or mirror antenna bracket) onto your handlebar clamp, clutch perch, or upper fairing stay, and adhering the magnetic satellite antenna face-up on that plate. Because the standard automotive antenna comes with 23 feet of thin coaxial cable, avoid wrapping twenty feet of excess wire around your handlebars in tight coils, which looks messy and can kink the fragile inner coaxial core. Either purchase a short-cable powersports satellite antenna (which has a heavy-duty 14-inch to 4-foot lead) or route the excess automotive cable in loose figure-eight loops zip-tied neatly beneath the fuel tank or fairing.
When choosing an antenna spot, follow four placement rules:
- Point the active face straight up: The domed top of the magnetic puck must face the sky, not sideways against a fork tube.
- Keep it clear of metal obstructions: Do not bury the antenna under metal luggage racks, aluminum top cases, or carbon-fiber fairings, which block microwave satellite signals. (Mounting inside a thin fiberglass batwing fairing on a Harley-Davidson or Indian touring bike often works well because fiberglass is transparent to RF signals.)
- Protect painted fuel tanks: Never stick a bare magnetic antenna directly onto a painted steel gas tank; road grit trapped underneath the magnet and chafing from the coaxial cord will quickly scratch your clearcoat.
- Check steering slack: Leave a smooth service loop where the antenna wire crosses from the handlebars to the frame so turning the bars to full lock never pinches or stretches the coaxial connector.
Getting SiriusXM Audio into Your Helmet or Touring Stereo
Mounting the receiver is only half of the setup; you also need a reliable way to hear the audio at 70 mph without signal dropouts or channel conflicts.
1. Bluetooth Helmet Communicators (Sena and Cardo)
If you ride with a Bluetooth helmet headset and choose the SiriusXM Roady BT (or pair an Onyx EZR with a 3.5mm Bluetooth transmitter), verify how your specific communicator handles multiple Bluetooth sources. Modern headsets from Cardo and Sena are designed to pair primarily with a smartphone and a motorcycle GPS. When you pair a standalone SiriusXM Bluetooth transmitter directly to your helmet, it typically occupies the headset’s main A2DP stereo music channel.
If you only want to listen to satellite radio, direct pairing works well. However, if you also want to hear turn-by-turn navigation prompts from a smartphone or Garmin Zumo at the same time, make sure your headset supports dual A2DP multipoint pairing or Audio Multitasking so the satellite radio stream does not block your GPS voice directions. You can compare multi-channel pairing profiles in our best motorcycle Bluetooth headsets guide.
2. Wired 3.5mm AUX and FM Direct Relay for Touring Bikes
If your motorcycle has a factory or aftermarket fairing sound system (such as a Harley-Davidson Boom! Box, Honda Gold Wing audio system, or marine head unit), a wired 3.5mm AUX connection from the SiriusXM dock or tuner into your stereo’s auxiliary input is the most dependable setup. It delivers full stereo fidelity, never needs battery charging, and lets you adjust volume using your bike’s factory thumb controls.
What if your motorcycle stereo only has an AM/FM radio and no AUX jack? Do not rely on wireless FM modulation on a motorcycle, as open-air interference makes wireless FM static-prone on highways. Instead, both the Roady BT and Onyx EZR support a wired SiriusXM FM Direct Adapter (FMDA25), which installs inline with your motorcycle’s physical FM antenna plug behind the fairing to send a direct, static-free signal into an unused FM frequency.
Weatherproofing: Protecting a Satellite Radio in the Rain
Unlike a dedicated motorcycle GPS such as the IPX7-rated Garmin Zumo XT3, standard automotive SiriusXM receivers like the Onyx EZR and Roady BT are not waterproof out of the box. Leaving a bare automotive satellite radio exposed on your handlebars during a summer thunderstorm will allow water to wick into the button seams and dock pins, corroding the circuit board.
To protect your setup in wet weather, use one of three proven strategies:
- Use a zippered weather-resistant enclosure: Mount the Onyx EZR or Roady BT display inside a clear-front zippered motorcycle radio case (such as a RAM Aqua Box or powersports satellite radio pouch) that bolts between your 4-hole AMPS plate and the dock.
- Unclip the receiver during heavy downpours: With a dock-and-play Onyx EZR, you can slide the radio out of its cradle in two seconds, stow it inside a dry jacket pocket or tank bag, and cap the exposed power leads.
- Protect the power and audio connections: Always mount the Roady BT’s 12V Intelligent Power Adapter or the Commander Touch’s hideaway tuner box inside a dry fairing cavity, tank bag, or under-seat compartment where road spray cannot reach the jacks.
For more tips on sealing handlebar electronics and cable entry points against storms, see our guide on keeping a motorcycle GPS dry in the rain.
SiriusXM Motorcycle Installation: 8-Step Checklist
Follow this sequence to install your satellite radio cleanly on the first pass without pinched wires or dead batteries:
- Select the right receiver for your audio system: Pick the Roady BT for Bluetooth versatility, the Onyx EZR for removable dock-and-play value, or the Commander Touch for a permanent wired fairing stereo install.
- Dry-fit the handlebar or perch mount: Position the mount where the display is easy to read without blocking your speedometer, neutral light, or ignition key.
- Check full lock-to-lock steering clearance: Turn the handlebars all the way to the left stop and all the way to the right stop to confirm the radio and RAM arm never touch the tank, windscreen, or brake reservoir.
- Mount the satellite antenna with a clear sky view: Secure the magnetic puck antenna facing straight up on a metal perch bracket or beneath a non-metallic fiberglass fairing, away from metal racks.
- Wire regulated, switched power: Connect the receiver using its proper 5V or 12V power adapter wired to an ignition-switched circuit so the radio powers down when the key is turned off.
- Connect and test your audio path: Pair your Bluetooth headset or plug the 3.5mm AUX cable into your bike’s stereo input and verify clean volume control before buttoning up the bodywork.
- Bundle and protect excess cabling: Route antenna, power, and audio wires alongside the factory wiring harness using zip ties, keeping all leads well clear of hot exhaust headers, suspension travel, and sharp fairing edges.
- Activate the Radio ID outdoors: Park the motorcycle outside with an unobstructed view of the sky, tune to Channel 0 (or check the sticker on the tuner housing) to find your 8-character Radio ID, and send the activation refresh signal.
SiriusXM Motorcycle FAQ
Can I use a SiriusXM car radio on my motorcycle?
Yes. Automotive receivers like the SiriusXM Onyx EZR and Roady BT use the exact same satellite network as powersports bundles. To run a car receiver on a motorcycle safely, you simply need a secure mechanical mount (such as a RAM B-size ball system), the proper 5V or 12V power connection, an upward-facing metal bracket for the magnetic antenna, and a weather cover for rain protection.
What is the best SiriusXM radio for a motorcycle?
For most riders installing a new standalone unit, the SiriusXM Roady BT is the best all-around choice because it offers built-in Bluetooth audio output alongside 3.5mm AUX and wired FM connections, plus a color screen and live pause/rewind. If you want a lower-cost removable unit that swaps easily into a car cradle, the Onyx EZR is the best value, while the Commander Touch is best for permanent fairing stereo installations.
Do Garmin Zumo XT, XT2, or XT3 GPS units support a SiriusXM antenna?
No. While older discontinued navigators like the Garmin Zumo 550 (with the GXM 30 antenna) and Zumo 665LM (with the GXM 40 antenna) supported direct satellite radio antennas, modern Garmin Zumo XT, XT2, and XT3 navigators do not support USB satellite radio receivers. Riders with modern Zumo units either stream the SiriusXM phone app over Bluetooth inside cell coverage or mount a separate Roady BT or Onyx EZR receiver for off-grid satellite reception.
Do I need a separate SiriusXM subscription for my motorcycle?
Each standalone SiriusXM receiver has its own 8-character hardware Radio ID and requires an active subscription on your account. However, there are two ways to avoid paying for a second full subscription: you can physically move a dock-and-play Onyx EZR receiver from your car cradle to your motorcycle cradle (since the Radio ID travels with the head unit), or you can use the SiriusXM smartphone app (which is included with standard vehicle plans) via Bluetooth or a motorcycle CarPlay screen whenever you have cellular service.
Can I pair a SiriusXM radio directly with a Sena or Cardo helmet headset?
The SiriusXM Roady BT includes built-in Bluetooth audio output that can pair with many Bluetooth headsets and speakers, while an Onyx EZR requires a separate 3.5mm Bluetooth transmitter or Bluetooth dock. Because helmet communicators prioritize smartphone and GPS pairing channels, always test how your specific Sena or Cardo model manages a standalone Bluetooth audio source if you plan to run GPS voice prompts at the same time.
Can I mount a SiriusXM radio next to my motorcycle GPS?
Yes, provided your handlebars have enough open clamping width and neither screen blocks your instrument cluster, warning lamps, or full lock-to-lock steering clearance. Using modular 1-inch RAM B-size mounts on opposite sides of the handlebar center clamp (or mounting one unit on a clutch reservoir perch) makes it easy to run a GPS and a satellite radio side by side.
Bottom Line: Which SiriusXM Motorcycle Setup Should You Choose?
If you are putting together a new standalone satellite radio system for highway touring and remote backroads where cell service drops out, start with the SiriusXM Roady BT. Its combination of integrated Bluetooth audio, 3.5mm AUX output, live pause and rewind, and a single thin cable running up to the display makes it the most flexible receiver for modern motorcycles.
Choose the SiriusXM Onyx EZR if you want to keep hardware costs down, prefer a high-contrast monochrome screen with a standard 4-hole AMPS cradle, or want to move one dock-and-play radio between your car and your bike on a single subscription. And if you ride a full-dress touring bike with an integrated fairing stereo and AUX input, the hideaway SiriusXM Commander Touch delivers the cleanest permanent installation.